
- to capture part of an image to paste into an e-mail (kids wish lists for birthdays, items you are shopping for or design ideas that you want to e-mail to your spouse or friend, etc. )
- to capture a portion of a Website as an image for sending feedback or ask a question
- to copy a portion of an e-mail or text document and then highlight parts of it
- to capture a face out of a group shot to use for your Facebook profile (or for an AAC image)
- to copy part of a Facebook post to e-mail to a friend who isn't on Facebook
- to make a quick edit, like cropping for posting online
- add to an AAC symbol or clipart to make a different symbol that doesn't exist
- to capture a page from your AAC device to e-mail, post online or print for a low tech version
- to quickly capture an image and black out portions for privacy before posting on-line (name and/or medical ID's, school name etc.)
- to capture a portion off your computer screen like an error message
- to capture portions of a screen for creating "how to manuals"
It's probably already installed on your computer. Not sure? Type snipping tool in your search bar.

If it doesn't easily show up, check on the Microsoft website for your operating system (how to access it is slightly different in each OS). I have the Snipping Tool pinned to my Start bar because I use it that much!
1) First make sure the image you want to capture is visible on your screen before opening the snipping tool otherwise you won't be able to get to it.
2) Click on the scissors icon or open the Snipping Tool and click New. It will default to the type of snip you last used (unless you click on the arrow to open the other types).

Most of the time you will probably use the rectangular snip but there are other types of snips. Window snip is for one window when you have multiple windows open and you don't want all of them, and full-screen is, well....your full-screen, which I rarely ever want and why the Snipping Tool is so much better than just using the "print screen" button.

Free form is like a real pair of scissors, see image below.

These snips can be saved as .JPGS or also can be saved as a .PNG file. This is important because it allows the image to be oddly shaped (not rectangular/square) without filling in the background so it can be use in other computer programs (Think digital scrapbooking or using in an AAC device when you want another background color for your button. Or for pasting the face of one person onto someone or something else, like for example maybe Trump's face on a donkey).
3) Drag the X cursor around the portion of the screen you want to capture. When the bounding box is surrounding the portion you want let go. Didn't quite get it perfect? That's okay, just click new to try again. Congrats, you've now captured your snip. What now?

4) If you want to make edits click on one of the tool icons or Tools button, if not skip to step 5.
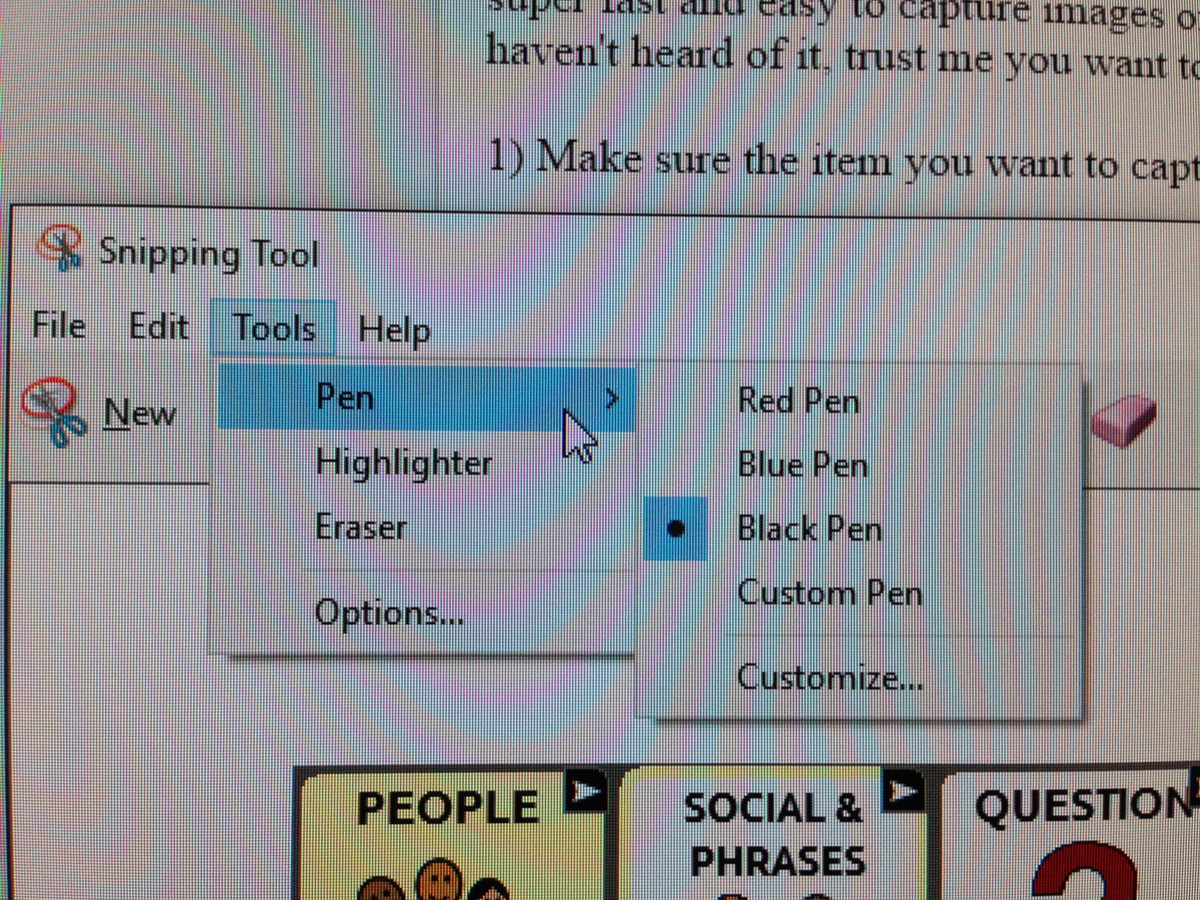
In addition to the standard red, blue or black pen you can customize the pen color, thickness and style in the drop down menus, shown below. There is also a highlighter. If you make a mistake with any of these use the eraser.


Examples of Edits

This snip shows LtoR second row from the top: the "a" whited out, "to" highlighted, "the" with black legs and eyes (modifying a symbol), and a pink circle. I made these just so you can see all in one image, but actually I kind of think I like the spider "the" and might use that.
All of these type of edits are super quick and easy to do! I promise!
5) When you are ready to use your image you can either save, copy or e-mail.

Save will open a dialogue box where you can choose the location and file type.

To start an e-mail click the e-mail button and the snip will be inserted as an image in the body of the e-mail.
Curious what the "Delay" feature is all about? It's for capturing menus that disappear before you can snip them. A video explaining how that works here.
*****
Here is an example of a document I created for school using Microsoft Word and the Snipping Tool (and of course our AAC Editor). It's Ainsley's "Daily Write" that tells us about her day at school (since she is non-verbal and can't tell us herself). It helps her to learn the AAC symbols, reinforce date concepts and emotions (which has not been successful because she ALWAYS circles happy). She was also working on "circling" which you can see she's pretty much mastered now.

I hope you find a bunch of ways to use the Snipping Tool!


.JPG)


